
DetailOAR Field Manual · Interior detailing
The Complete Interior Reset Process
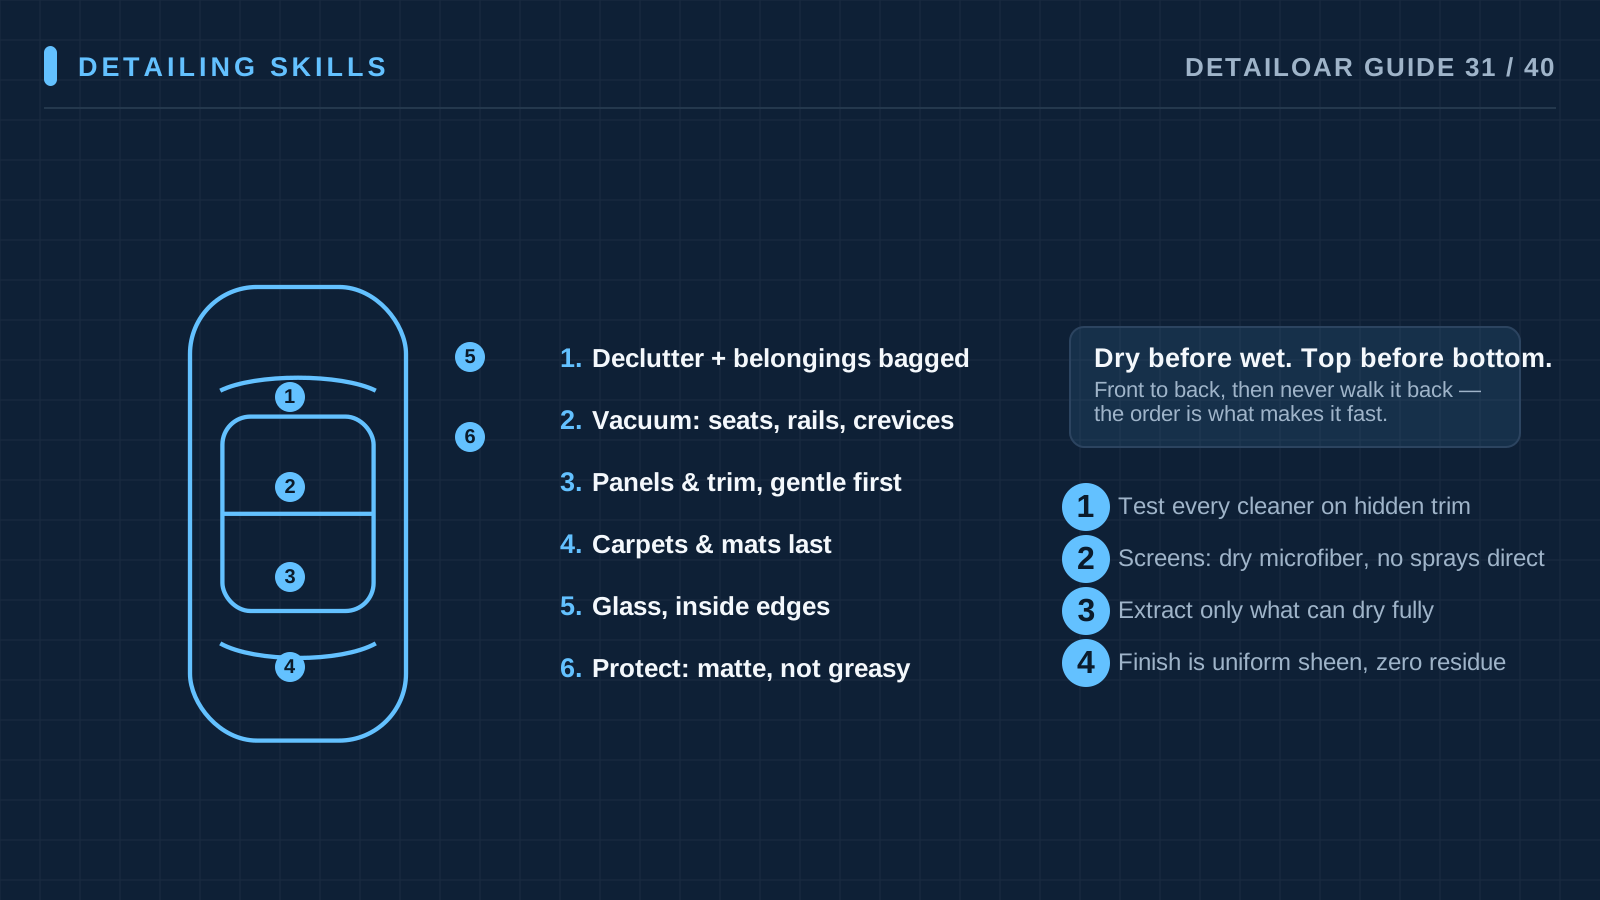
Reset an interior in the right order: inspect, control belongings, pull the dry soil first, clean by material, hold back on moisture, do the glass, dry it out, and run final QC.
Save or use this guide
Contents
Start
Know the outcome.
Deliver the same clean interior every time while protecting electronics, airbags, delicate finishes, the customer’s property, and your drying time.
Audience, time, and cost
Beginners and teams standardizing everyday interior work. Biohazard, active mold, infestation, flood, or unknown contamination is a different job — it requires a separate qualified response.
Time and costCondition, vehicle size, pet hair, stains, child seats, and moisture set the clock. Severe conditions get a revised estimate before the work starts, not after.
Before you start
Inspect the materials and their condition, agree on how personal items get handled, find the sensitive controls and prior repairs, read the labels and SDS, and plan your ventilation and drying.
Tools and materials
- vacuum with suitable attachments
- soft brushes
- towels by zone
- compressed air/blower where safe
- inspection light
- material-compatible cleaners
- glass cleaner
- PPE
- belongings bag
- floor protection
Steps
Do the work in order.
-
Step 1 Document and control belongings
Photograph the condition, inventory the valuables you can see, put approved loose items in a labeled bag, and keep documents and private items secure.
-
Step 2 Create access safely
Move seats only after checking the tracks and wiring, pull the mats, protect the thresholds, and don’t disconnect powered components without an approved procedure.
-
Step 3 Remove dry debris top to bottom
Vacuum from head-level ledges down through seats, seams, consoles, carpets, and cargo, with suitable soft agitation and controlled air kept away from faces and electronics.
-
Step 4 Clean hard surfaces by material
Test first, then work compatible cleaner from the towel or tool rather than flooding. Take controls, trim, plastics, leather-like surfaces, cupholders, and jambs in small sections.
-
Step 5 Treat textiles by need
Spot-treat and extract only where it’s warranted. Keep chemistry and moisture on a tight rein, protect the electronics under the seats, and don’t promise full stain or odor removal.
-
Step 6 Clean glass and mirrors
Use dedicated clean towels and a compatible product, protect the tint and films, and check your work from more than one angle.
-
Step 7 Dry, reassemble, and protect
Ventilate, keep air moving safely, put back only dry mats and items, return seat and control settings where appropriate, and remove your temporary protection.
-
Step 8 Run interior QC
Check under natural and inspection light, touch-check for residue, smell for any unresolved source, test only the controls you’re authorized to touch, photograph the result, and note permanent limits.
Reference
Use the detail when you need it.
How it works
An interior reset runs dry work before wet, and cleaner upper zones before dirtier lower ones, so nothing you just cleaned gets re-soiled. Knowing your materials and using the least moisture that still works protects adhesives, foam, electronics, dyes — and your drying time.
Terms used in this guide
- Dry soilLoose particulate that vacuuming or controlled air should take out before any liquid shows up.
- TransferDye, soil, or product moving from one material or towel to another, where it doesn’t belong.
Common mistakes
- Spraying cleaner straight into the controls.
- Wetting the carpet before it’s been vacuumed.
- One towel doing both glass and dressings.
- Overwetting the headliner or seats.
- Putting shine on the steering wheel or pedals.
- Handing back a damp vehicle closed up tight.
Troubleshooting
- Dust returns from seamsGo back to controlled dry agitation and vacuuming before you reach for more cleaner. Check the air vents and seat tracks, within scope.
- Surface feels stickyLook for over-application or an incompatible residue, then use the manufacturer-approved removal method — after a test spot.
- Interior will not dry by handoffStep up safe ventilation and air movement, notify the customer, and delay closing the car up. Trapped moisture is the worse outcome.
Finish
Check the result and close the loop.
What good looks like
- Every personal item is accounted for.
- Dry soil came out before anything got wet.
- Controls and safety surfaces are matte and residue-free.
- Textiles are dry enough for a safe handoff.
- Glass has no streaks.
- Permanent wear and defects are documented, not glossed over.
Final checklist
- Belongings controlled
- Dry soil removed
- Materials test-spotted
- Hard surfaces residue-free
- Textiles treated to need
- Glass clear
- Interior dry and ventilated
- QC and photos complete
What to do next
- Bring in specialist stain or odor steps only where approved.
- Send the customer off with care and drying instructions.
- Record condition and time to sharpen future pricing.
More
Continue only where it helps.
Prerequisites
Vehicle Check-In, Inspection, and Damage Documentation15 min readThe Essential Equipment and Chemical Buying Checklist16 min readLearning paths with this guide
Learn Interior Detailing7 guidesFrequently asked questions
Should seats be removed?
Not as a routine. Removal can touch airbags, wiring, torque requirements, and liability — use trained, documented, manufacturer-appropriate procedures, and only when authorized.
Can every stain be removed?
No. Material damage, dye loss, heat setting, prior chemistry, and plain age can make a stain permanent. Test, then set expectations honestly.
How dry must the interior be?
Dry enough that materials, electronics, odor, and the customer’s use of the car are not put at risk. Give specific ventilation guidance, and delay the handoff when you have to.
Sources and review
Reviewed by DetailOAR Editorial Review on July 15, 2026. Verify current labels, interfaces, prices, and local requirements before acting.
Related field guides
 Detailing SkillsCarpet and Upholstery Stain Removal and ExtractionFigure out the stain and the fiber before touching either, test for colorfastness, use controlled chemistry and gentle agitation, extract with minimal moisture, dry fully, and note what won’t come out.
 Detailing SkillsPet Hair and Odor RemovalTake on pet hair and odor the honest way: document the condition, protect yourself, recover the hair dry, treat the actual source, dry the materials, and skip unsafe masking and ozone claims.
 Detailing SkillsHow to Clean Leather, Plastics, Screens, and Interior GlassKnow what each interior surface is made of, use the gentlest compatible method that works, protect the controls and coatings, and leave leather, plastics, screens, and glass residue-free.