
DetailOAR Field Manual · Mobile operations
How to Set Up a Mobile Detailing Vehicle or Trailer
Lay out a mobile detailing rig around payload, securement, safe utilities, fast setup, wastewater control, and restocking you can repeat without thinking.
Save or use this guide
Contents
Start
Know the outcome.
You’ll build a documented mobile layout that stays inside your vehicle’s ratings and deploys, packs, and inspects the same way every time.
Audience, time, and cost
Mobile operators running a car, van, truck, or trailer, including anyone graduating from loose gear rattling around a personal vehicle.
Time and costA basic modular layout can come together in a day. Permanent tanks, power, plumbing, or trailer work may need qualified installers and inspections.
Before you start
Dig up your vehicle’s payload, axle, towing, tongue-weight, tire, electrical, and ventilation limits. Then list every piece of equipment at its filled operating weight.
Tools and materials
- payload worksheet
- scale access
- electrical load sheet
- layout tape
- approved containers
- rated tie-downs
- ventilated storage
- spill and wastewater supplies
Steps
Do the work in order.
-
Step 1 Calculate the full operating weight
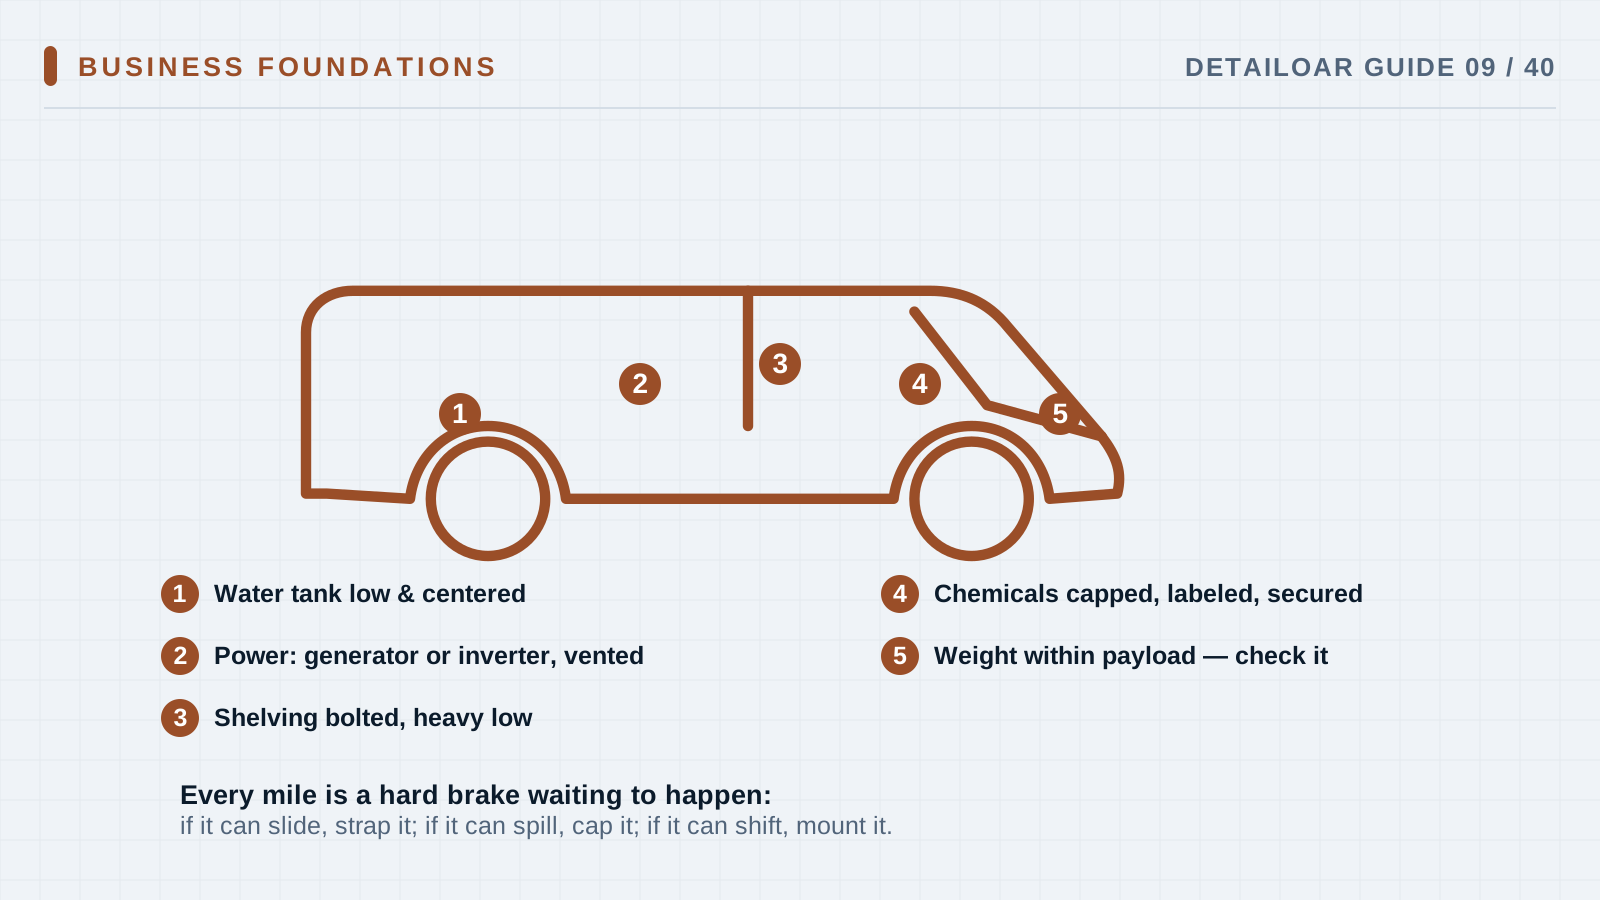
Add up occupants, full water and fuel, equipment, chemicals, towels, accessories, trailer tongue weight, and a realistic margin for what you’ll add later.
-
Step 2 Draw your workflow zones
Mark out heavy utilities, chemical storage, clean towels, dirty returns, the tools you grab constantly, PPE, spill response, and customer-property protection.
-
Step 3 Secure the tanks and equipment
Use manufacturer-approved mounts and rated tie-down points, and shield sharp edges, valves, and hoses from impact.
-
Step 4 Design water and wastewater handling
Sort out legal water sourcing, backflow protection where it’s required, your capture method, containment, and approved disposal.
-
Step 5 Design safe power
Total up running and startup loads, use outdoor-rated cords with GFCI protection, keep fuel and exhaust isolated, and bring in a qualified installer for permanent wiring.
-
Step 6 Ventilate and label the storage
Keep products in labeled containers within their temperature limits, separate incompatibles per the SDS, provide ventilation, and mount the spill kit where you can grab it.
-
Step 7 Run timed deployment drills
Load to operating condition, drive it safely, set up, walk a dry workflow, pack, inspect, and weigh the rig.
-
Step 8 Create daily and weekly checks
Look over tires, hitch, securement, leaks, cords, hoses, PPE, extinguishers where required, inventory, and dirty-towel containment.
Reference
Use the detail when you need it.
How it works
A mobile rig is a small workplace and a cargo system at the same time. Good design puts the heaviest items low and near the right axle, keeps clean and contaminated items apart, stops things from moving, ventilates the chemical storage, and shortens the setup path you repeat at every job.
Terms used in this guide
- PayloadThe most combined weight of occupants, cargo, fluids, accessories, and tongue weight your vehicle is allowed to carry.
- GFCIGround-fault circuit interrupter protection, designed to cut the risk of shock in wet environments.
Common mistakes
- Sizing the tank before doing the payload math.
- Hanging a heavy tank behind the rear axle.
- Running a generator inside a van or near occupied openings.
- Using household cords for wet work.
- Leaving dirty towels sealed up damp.
Troubleshooting
- The rear suspension sags or the handling changesStop driving the loaded setup, weigh each axle individually, and reduce or relocate weight with qualified advice.
- Setup drags on too longMove your most-used items to first-access spots and bundle each process into its own labeled module.
- The water supply is unreliableTrim water demand with an approved process, confirm refill points, or take fewer jobs. Don’t haul unsafe weight to compensate.
Finish
Check the result and close the loop.
What good looks like
- Weight math includes full fluids and the people on board.
- Heavy items ride low and strapped.
- Clean and dirty materials never share open storage.
- Power and water connections stay protected.
- Setup runs the same every time and leaves the customer’s site clean.
Final checklist
- Loaded weight verified
- Rated securement installed
- Power load and GFCI checked
- Wastewater method approved
- Chemicals labeled and ventilated
- Setup drill passed
- Inspection checklist in use
What to do next
- Set your travel buffers and service areas.
- Practice the exterior and interior workflows.
- Price with your actual setup time, not a guess.
More
Continue only where it helps.
Prerequisites
Mobile, Shop, or Hybrid: Choosing the Right Detailing Business Model12 min readThe Essential Equipment and Chemical Buying Checklist16 min readLearning paths with this guide
Start a Mobile Detailing Business13 guidesFrequently asked questions
How large should the water tank be?
Size it from actual process consumption and your refill access, then check the filled weight against every vehicle rating. Bigger isn’t automatically better.
Can I run a generator in the van?
No. Never run combustion equipment in an enclosed or occupied space. Follow the manufacturer, fire rules, and qualified installation guidance for exhaust and fuel.
Do I need wastewater capture?
Requirements vary by location and job. Before you operate, confirm the approved method with your local environmental or public-works authorities.
Sources and review
Reviewed by DetailOAR Editorial Review on July 15, 2026. Verify current labels, interfaces, prices, and local requirements before acting.
Related field guides
 Detailing SkillsThe Safe Exterior Wash Process From Start to FinishWash an exterior the controlled way: cool surfaces, a real pre-rinse, lubricated contact, dirty tools kept away from clean paint, a full rinse, safe drying, and a final inspection.
 Business FoundationsBusiness Registration, Licenses, Insurance, and Basic ComplianceGet organized on the registrations, permits, insurance, tax setup, environmental duties, and records your detailing business may need.
 Detailing SkillsFinal Quality Control, Customer Handoff, and Working Faster Without Cutting CornersPut staged quality gates, a fixed final inspection route, an evidence-based handoff, and honest time studies to work — and raise throughput without deleting safety or quality.