
DetailOAR Field Manual · Exterior decontamination
Chemical Decontamination and Clay Treatment
Diagnose what’s actually bonded to the paint, treat it with compatible chemistry and well-lubricated mechanical work, then check for marring before any protection goes on.
Save or use this guide
Contents
Start
Know the outcome.
Remove the bonded contamination that should come off, with the least aggressive process that works, and know whether any marring — new or pre-existing — needs correction.
Audience, time, and cost
Technicians getting paint ready for protection or polishing, always after a complete safe wash.
Time and costA lightly contaminated vehicle may take 45 minutes. Heavy fallout, tar, overspray, or delicate materials can blow past the quoted scope — say so early.
Before you start
Confirm compatibility with the paint, wraps and films, matte surfaces, trim, wheels, glass, and any coating. Inspect for repaint, failure, oxidation, chips, and delicate edges.
Tools and materials
- inspection light
- chemical-resistant sprayer if specified
- clay media
- clean towels
- label-approved fallout remover
- tar remover only if needed
- clay lubricant
- PPE
Steps
Do the work in order.
-
Step 1 Wash, dry selectively, and inspect
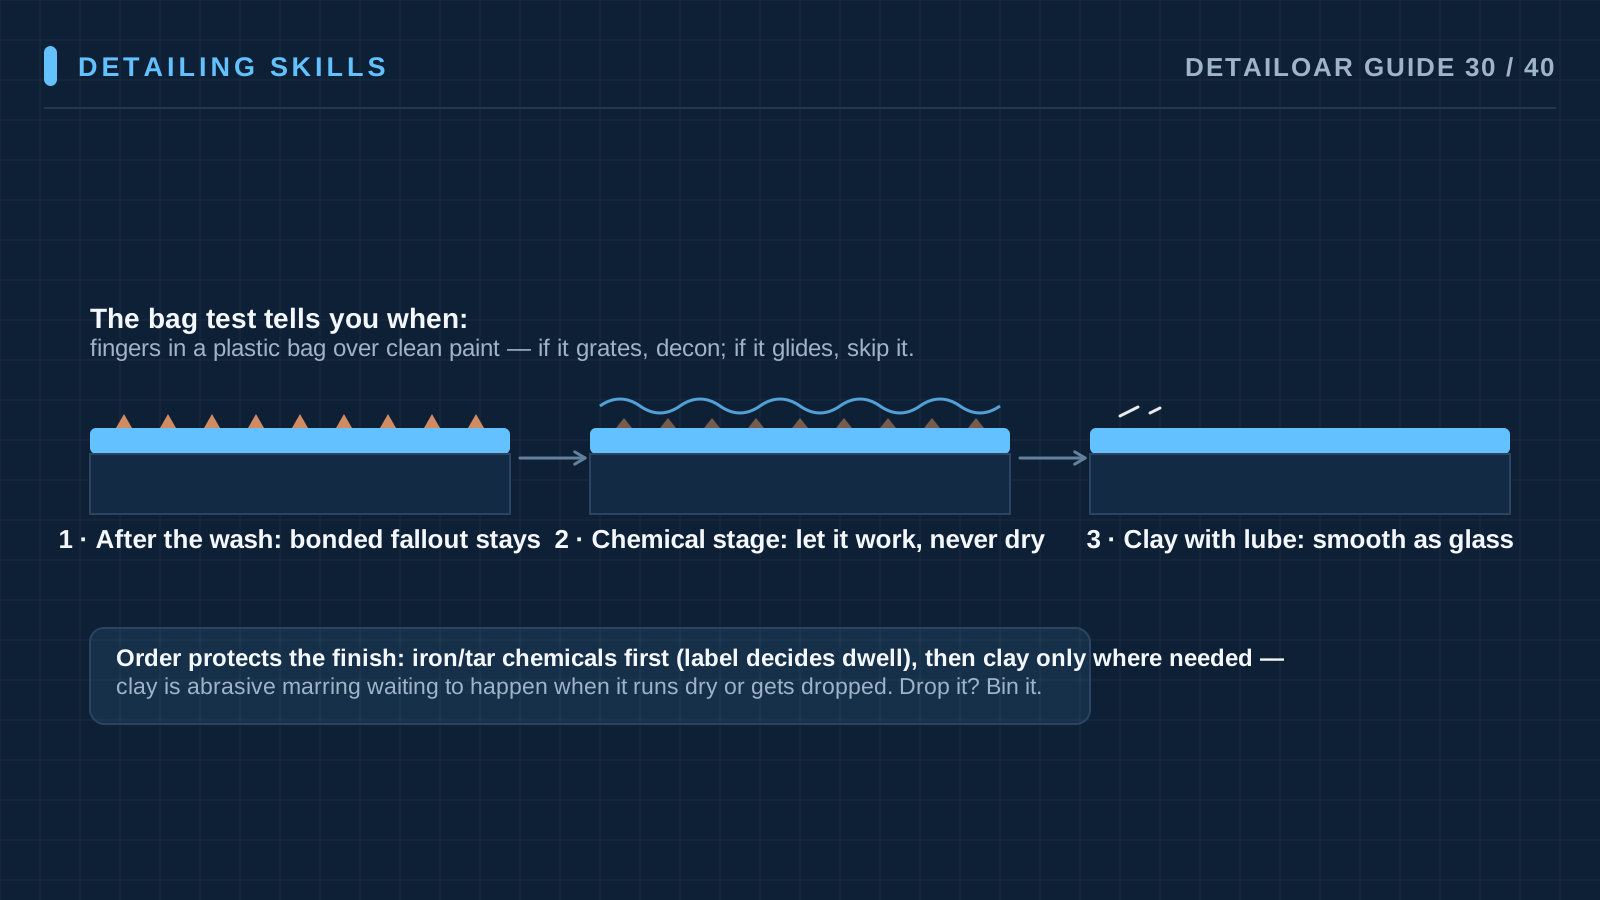
Start with a fully washed, cool vehicle. Use your eyes, good light, and a protected tactile check to map roughness, fallout, tar, overspray, and stains.
-
Step 2 Choose the least aggressive sequence
Match only approved products to the diagnosed contamination and the vehicle’s materials, and set test areas on paint and on the sensitive surfaces next to it.
-
Step 3 Apply chemical decontamination
Follow the label for wet or dry surface, dilution, coverage, dwell, agitation, temperature, ventilation, and rinse — the label decides all of it. Keep the product from drying.
-
Step 4 Treat isolated tar or residue separately
Use a compatible product on just the spots that need it, with controlled towels, and remove it fully before another chemistry stage begins.
-
Step 5 Reassess before clay
Rinse and look again. Clay only the areas that are still bonded and compatible — and stop if the paint is failing or the next service doesn’t call for it.
-
Step 6 Clay with abundant lubrication
Use clean, divided media with light straight passes over small areas, inspecting often. Drop it once and it goes in the trash. Never work dry.
-
Step 7 Final rinse/wipe and inspect for marring
Remove the lubricant, dry safely, and inspect under directional light. Document whether protection can go ahead or polishing needs approval first.
Reference
Use the detail when you need it.
How it works
Bonded contamination gets diagnosed, not attacked. Chemical steps can dissolve specific material with less friction; clay or synthetic media shears off what remains, but it can mar paint while doing it. Stop when the surface is acceptably clean for the next service — not when every last stain has been aggressively chased.
Terms used in this guide
- Bonded contaminationMaterial stuck on hard enough that a normal wash won’t take it off.
- MarringThe fine scratches or haze left behind by abrasion or contaminated media.
Common mistakes
- Claying every vehicle on autopilot.
- Leaning on the clay to speed it up.
- Letting fallout remover dry.
- Running tar and fallout steps together.
- Picking dropped media back up.
- Waxing over freshly revealed marring without telling the customer.
Troubleshooting
- Roughness remains after clayStop and identify what it is — overspray, sap, mineral deposits, or failing paint. Then use a compatible specialist process or revise the scope.
- Clay leaves visible hazeStop. Check your media, your lubrication, and the paint’s softness, then get approval for the least aggressive correction test.
- Chemical discolors trimRinse immediately the way the SDS and label direct, stop using the product, document what happened, and contact the manufacturer or a qualified specialist for material-specific guidance.
Finish
Check the result and close the loop.
What good looks like
- The contamination was diagnosed before anything was applied.
- Chemical stages never dried and never mixed.
- Clay media stayed clean and well lubricated.
- Mechanical treatment only touched the areas that needed it.
- Marring got inspected before protection.
- Permanent etching is called what it is, not passed off as contamination.
Final checklist
- Materials and condition verified
- Contamination mapped
- Test spot passed
- Chemical stages kept separate
- Clay limited and lubricated
- Residue removed
- Marring inspected
- Next step approved
What to do next
- Apply protection once the finish meets the agreed standard.
- Run a correction test if marring is in scope.
- Feed the real contamination time back into future estimates.
More
Continue only where it helps.
Frequently asked questions
Does every car need clay before wax or sealant?
No. Inspect first and follow the protection manufacturer’s preparation requirements. Clay the car doesn’t need is just abrasion you added.
Can clay remove scratches or water-spot etching?
No. Clay removes certain bonded material, nothing more. Scratches and etching need their own assessment — and may not be safely removable at all.
Can fallout remover be used in direct sun?
Follow the label — it decides. Most processes are safer on a cool surface out of direct sun, where you can keep the product from drying.
Sources and review
Reviewed by DetailOAR Editorial Review on July 15, 2026. Verify current labels, interfaces, prices, and local requirements before acting.
Related field guides
 Detailing SkillsHow to Perform a One-Step Machine PolishRead the paint before you touch it, prep and mask, prove a least-aggressive test spot, polish with the pads and panel temperature under control, inspect hard, then protect.
 Detailing SkillsPaint Correction: Defect Inspection, Test Spots, and Multi-Step PolishingPlan advanced correction like the irreversible work it is: classify defects and paint risk, prove the test system, keep cut and finish stages separate, control heat and residue, and refuse unsafe removal.
 Detailing SkillsCeramic Coating Preparation, Application, and Customer AftercareBuild a controlled coating environment, verify the paint and product suit each other, apply and level exactly by the manufacturer’s system, guard the cure, and hand over exact aftercare.